Test Results
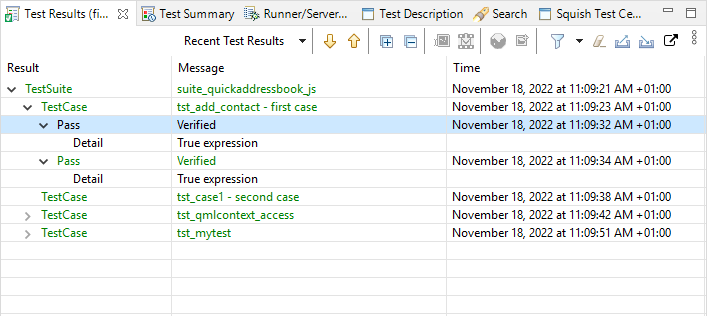
The Test Results view is shown in the Test Management Perspective. It shows the results of the most recent test run.

The Test Results view
By default, the view shows all kinds of results: passes, fails, warnings, and so on. To filter results, click the Filter the Results dropdown ( ).
).
To load test results that have been generated by an earlier test execution in the Squish IDE, select them in the Recent Results dropdown.
Click the Next ( ) and Previous (
 ) buttons to jump backwards and forwards through the test results, stopping at each failure or error.
To expand and collapse nested entries in the results tree, click the Expand All ( ) and Collapse All (
 ) buttons.
To compare the actual value of a verified object with the expected value stored in a verification point file, click the View Differences ( ) button.
Click the Use as Expected ( ) button to update the verification point, replacing the current expected value with the actual one obtained during test execution. Similarly, click the Select New Image Search (
 ) button to update images.
Click the Jump to Video at Timestamp ( ) button to open the currently selected entry in the test results in the Video Player view.
Click the Clear ( ) button to empty the view.
To save and load test results in a zipped format for sharing, click the Export ( ) and Import (
 ) buttons.
Importing Test Results
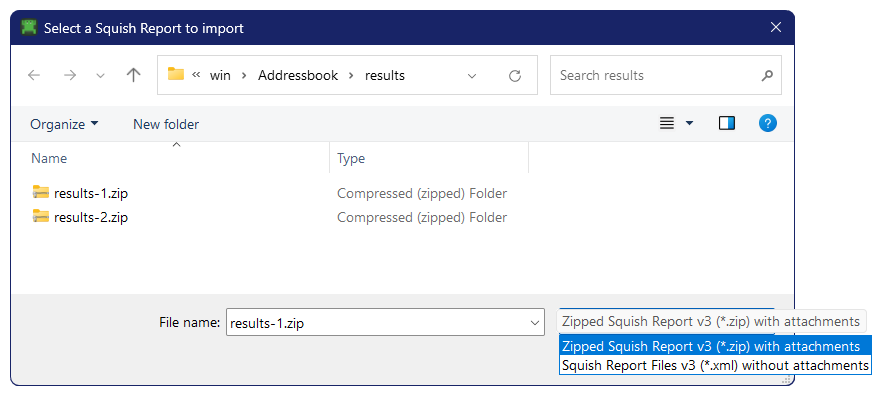
Squish IDE offers the import of test results in two different formats. The first format is an XML file without attachments, such as image or video files. The second format is a ZIP archive file containing all these attachments, which is the preferred format.
You can choose between these two formats while importing test results using the file filter at the bottom right in the file selection dialog.

Click the Upload Results to Test Center ( ) button to upload the results directly to Test Center if you have configured it in the Test Center view.
Right-click the view to open a context menu, where you can use the Select All action to select all the view contents and the Copy action to copy them to the clipboard.
To execute the test case or scenario that the selected result entry belongs to, select the Re-Run Test action in the context menu. This enables you to re-run just the failed part of a larger test execution to investigate a failure.

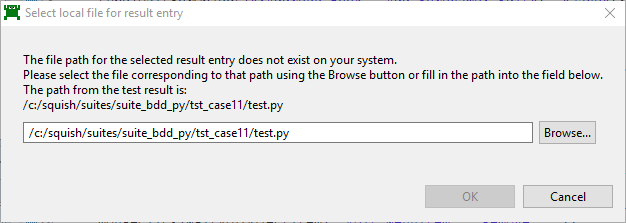
The result entry location dialog
If you import test results generated on a different system, the Test Results view might not find the paths and files mentioned in the report on the local system when you double click an entry to look at the test script. In such cases, the view asks you where the particular file or directory is located on the local system. It will then try to guess other paths it needs based on the selection, so that it does not have to ask for every single file.
© 2024 The Qt Company Ltd.
Documentation contributions included herein are the copyrights of
their respective owners.
The documentation provided herein is licensed under the terms of the GNU Free Documentation License version 1.3 as published by the Free Software Foundation.
Qt and respective logos are trademarks of The Qt Company Ltd. in Finland and/or other countries worldwide. All other trademarks are property
of their respective owners.

